Finding the Right Crush for Gluten-Free Malts
Increasing extract yield through grain-specific milling


I’ve long suspected that gluten-free malts should be able to deliver much higher yields than we typically achieve. With the right temperatures and enzymes, it’s pretty easy to get yields that suggest a theoretical maximum of around 30 PPG for both millet and rice malts. Yet for reasons I’ll explain below, that still seemed too low.
I figured there were probably some gains to be had through more effective milling. That’s why I decided to do a series of sieve tests, with the goal of finding the ideal crush for both types of grain and unlocking as much extract as possible.
Using these optimized grists, I can now hit numbers that suggest a theoretical maximum of 34 PPG without creating any lautering problems (90%+ kettle efficiency). This brings our yields to the same range as heirloom or specialty barley malts.
The role of grain milling in brewing
The reason brewers crush their grain is to make the contents more accessible to enzymes. This may seem obvious, but there’s actually some nuance involved, because the effect of crushing grain is not the same for every species, or even between different varieties within a species.
Some grain types are more naturally friable than others, meaning that they have a tendency to shatter into small pieces when pressure is applied. Traditional brewing malts have been bred for greater friability, because that lets you shatter the inner portion of the grain into small chunks while leaving the husks more or less intact for lautering.
Of course, as with anything, it’s about balance. Malt that is too friable has a tendency to crumble into flour, which can lead to damage during transportation and stuck mashes. Malt that is not friable enough (often called glassy) produces dense chunks that resist giving up their starches during the mash.
Further complicating things, the starch structures in different grains react differently during the mash. Quinoa has a tendency to puff up like popcorn, making it naturally easy to convert to sugar, even when using uncrushed whole grain. You get a similarly easy conversion with white basmati rice, because its starch is organized into tiny tendrils that expand as the grain is gelatinized—this is what makes basmati rice so fluffy when cooked as food. On the other end of the spectrum, something like sticky rice has been bred to give a dense, clingy consistency. These starches are much harder to extract, even when the grain is crushed quite fine.
So assuming you can extract the starch, how much is there to be had for gluten-free malts? There is definitely debate on this topic, but we do have some hard data to guide us.
Grouse Malt House publishes a spec sheet listing potential extract for their millet malts as 70-75%. I won’t get into all the calculations, but 75% works out to about 34 PPG. I asked founder Twila Soles how she derived those numbers, and it turns out she uses a modified version of the American Society of Brewing Chemists (ASBC) fine-grind standardized mash, with enzymes added at the appropriate temperatures.
With rice, I figured a similar extract yield of 34 PPG should also be possible, simply because flaked rice works out to 39 PPG, brown rice is about 90% starch, and rice hulls weigh very little.
Note that these are theoretical maximums—what would be called dry basis fine grind (DBFG) for barley. DBFG is determined in the lab and is near-impossible to hit in the brewhouse. Still, I’m aiming for an apples-to-apples comparison, and when brewers say that 2-row barley yields 37 PPG, they’re talking about the DBFG numbers. So when I talk about 34 PPG for millet or rice, I’m doing the same.
How to define a good crush
Almost all of the malt crushing advice out there is based on barley and doesn’t translate directly to millet and rice. Thankfully, it’s not very hard to measure the components of a grist and come up with your own baselines.
The official procedure for this is the ASBC sieve test. Using standardized sieves, you shake a sample of malt for three minutes, tapping it every fifteen seconds, then weigh the amount of material on each level, including the bottom collection pan.
The full version of the test uses six different sieves, but most examples I’ve seen online only use three. The standard sieve sizes are as follows. They’re measured in US Mesh sizes, and I’ve also provided the more intuitive micron equivalents.
| Sieve (US mesh) | Sieve (microns) |
|---|---|
| #10 | 2000 |
| #14 | 1410 |
| #18 | 1000 |
| #30 | 590 |
| #60 | 250 |
| #100 | 149 |
Next, I needed some targets to aim for. Good lautering requires a minimum ratio of large chunks for flowability. It also requires that flour production stay below a certain threshold to avoid stuck mashes. These ratios should be more or less consistent regardless of the type of grain, since they’re more about physics than chemistry, so I decided to contrast a couple of the common barley recommendations.
Briess suggests a set of milling best practices (PDF) for its malts, based on tests done with #14, #30, and #60 sieves. Their ideal “normal” grind has a ratio roughly of 54:28:10:8 and looks like this:

From the Briess milling guide; an example of which size of particles end up on each sieve.
In the early 2000s, Van Havig did his own assessment (PDF) of the ideal crush for the Rock Bottom chain of brewpubs, using #14, #18, and #60 sieves. He found that it was closer to 70:15:10:5. When Rock Bottom brewers used a grist similar to the Briess recommendations, their efficiencies suffered.
Why? Because brewhouse design affects lautering efficiency. On a homebrew scale, it’s pretty easy to keep the grist evenly suspended in the mash by stirring occasionally. Likewise, larger brewhouses with rakes and/or dedicated lauter tuns have the tools to break up surface tension, ensure mash consistency, and prevent channeling. However, on smaller 2-vessel, 7-15 BBL systems like those found at Rock Bottom, the mash-lauter tun is too large to equilibrate by hand and too small to warrant a rake system. As such, a coarser grind is necessary to ensure good filtration.
At the end of the day, then, a good crush is one that gives you the maximum yield for your system. Larger brewers with mash filters or self-adjusting rake systems can grind much finer to squeeze every last bit of sugar out of their grains. Everyone else needs to find the right balance between their equipment and their malts. Below are some best-in-class numbers for various brewery types.
| Brewery Type | Conversion Efficiency | Kettle Efficiency | Brewhouse Efficiency |
|---|---|---|---|
| Homebrewer | 95% | 90% | 80% |
| Microbrewery | 97% | 93% | 90% |
| Mash Filter or Large Brewery | 100% | 98% | 97% |
Translating to gluten-free malts
I decided to go with the Van Havig set of sieves for my tests: #14, #18, #60. The upper sieves are arguably the most important, since they collect larger, lauter-assisting chunks. The #30 and #60 both collect grits of varying coarseness, so I didn’t feel there was as much to learn by sorting them out—they will both give you small bits of malt that are of a good size for effective conversion. Anything finer than #60 is basically just mash-clogging flour.
For milling, I used the Monster MM2 mill that we have for our half-barrel pilot system. All the gap setting recommendations that follow are, of course, specific to that mill. If you use a different mill, your results may vary, though for homebrewers these baselines should be close enough. At the pro level, you should probably do your own tests; the sieves will pay for themselves in increased efficiency in no time.
When I started doing tests, it immediately became clear that the standard sieve ratios were not going to be optimal for either millet or rice. The small size of millet meant that a good number of the kernels on the #14 sieve were unopened, despite ratios pretty close to the Briess standards. For rice, on the other hand, the proportion of flour in the pan was very low, suggesting that a lot of potential sugars were being locked up in glassy, hard-to-convert malt fragments.
I’ll discuss the tests and solutions for each type of grain separately below. For each crush setting, I did two tests and then averaged the results. I never got ratios that varied by more than 1% per sieve per test, so I assume the MM2 produces these results fairly consistently.
Millet malt tests
I tested four different crush settings for millet. The friability of the malt seems to be slightly lower than standard barley malt, judging by the amount of flour collected in the pan, but it isn’t problematically glassy. However, the small size of the grain creates issues for a knurled-roller mill like the MM2. Even at the smallest 0.5mm gap setting, a fair number of grains remained unopened after a single pass through the mill, since the gap between the non-knurled part of each roller is much wider than 0.5mm.
I was able to correct for this by milling the grain twice, which works fine on the homebrew scale but obviously not in a commercial brewery where a different roller design or a mill with more rollers might be a better solution. Below are the averaged results.

Results of millet malt sieve tests, with Rock Bottom and Briess recommendations given for context
It should also be noted that only the two smallest double-pass tests gave me a grist with virtually no unopened hulls, so I don’t consider anything larger than 0.55mm to be appropriate for millet malt. Yet even at the finest setting, double-milled, total flour was below the Briess standard and not too far off from Rock Bottom. This is why I concluded that millet malt is less friable than barley malt, but not by a large degree.
The bigger problem is the lack of filtration-sized chunks on the top two pans, adding up to less than either Rock Bottom or Briess in all the double-pass tests. That is likely to cause lautering challenges in an all-millet beer unless rice hulls are used.
Rice malt tests
I tested eight different settings for rice malt, because the results were unintuitive and it took me a while to figure out the best solution. Rice malt is quite glassy, a lot less friable than millet or barley, which means that it produces very little flour.
In addition, rice malt also has an oblong shape, sort of like a kayak, which is much more narrow in one direction than the other. As a result, although rice malt is several times larger than millet malt, it doesn’t need a much larger gap size—even at 0.55mm, a few rice kernels slip through the mill when you load it up. At large gap sizes, a fair number of kernels remain unopened.

Results of rice malt sieve tests, with Rock Bottom and Briess recommendations given for context
As you can see from the chart above, single-pass milling of rice with the same gap as millet produces surprisingly little flour, due to its lower friability. It does, on the other hand, give you filtration in line with the Rock Bottom targets.
Yet the yield from that crush was suboptimal. I did a few mini-mashes on the 0.5mm single-pass grist and got only slightly better efficiency than I had with my previous standard of 0.7mm.
I suspected there was more extract to be had, so I did double-pass milling tests to try to get closer to the 5% flour range. I figured this would probably break up the grist into fine enough particles that I could hit my targets. It would probably also significantly lower the amount of material on the lautering-critical top sieve, but I hypothesized that it might not matter due to the higher glassiness of rice malt: small, hard rice particles would hopefully provide a certain amount of filtration themselves.
This worked.
With the 0.6mm double-pass grist, total flour is up significantly, but it’s still below the Rock Bottom targets and there is more than enough filtration to avoid a stuck mash. In recent brew sessions on our pilot system, I am able to hit conversion efficiencies in the mid-90s and kettle efficiencies in the low-90s with a 60-minute lauter.
Milling recommendations
For both millet and rice, the ideal crush ended up being somewhat different from what you would want for barley, due to the physical shape of each grain and their respective friabilities. However, it is vindicating to see that a properly optimized grist brings their yields to within the same range barley brewers enjoy.
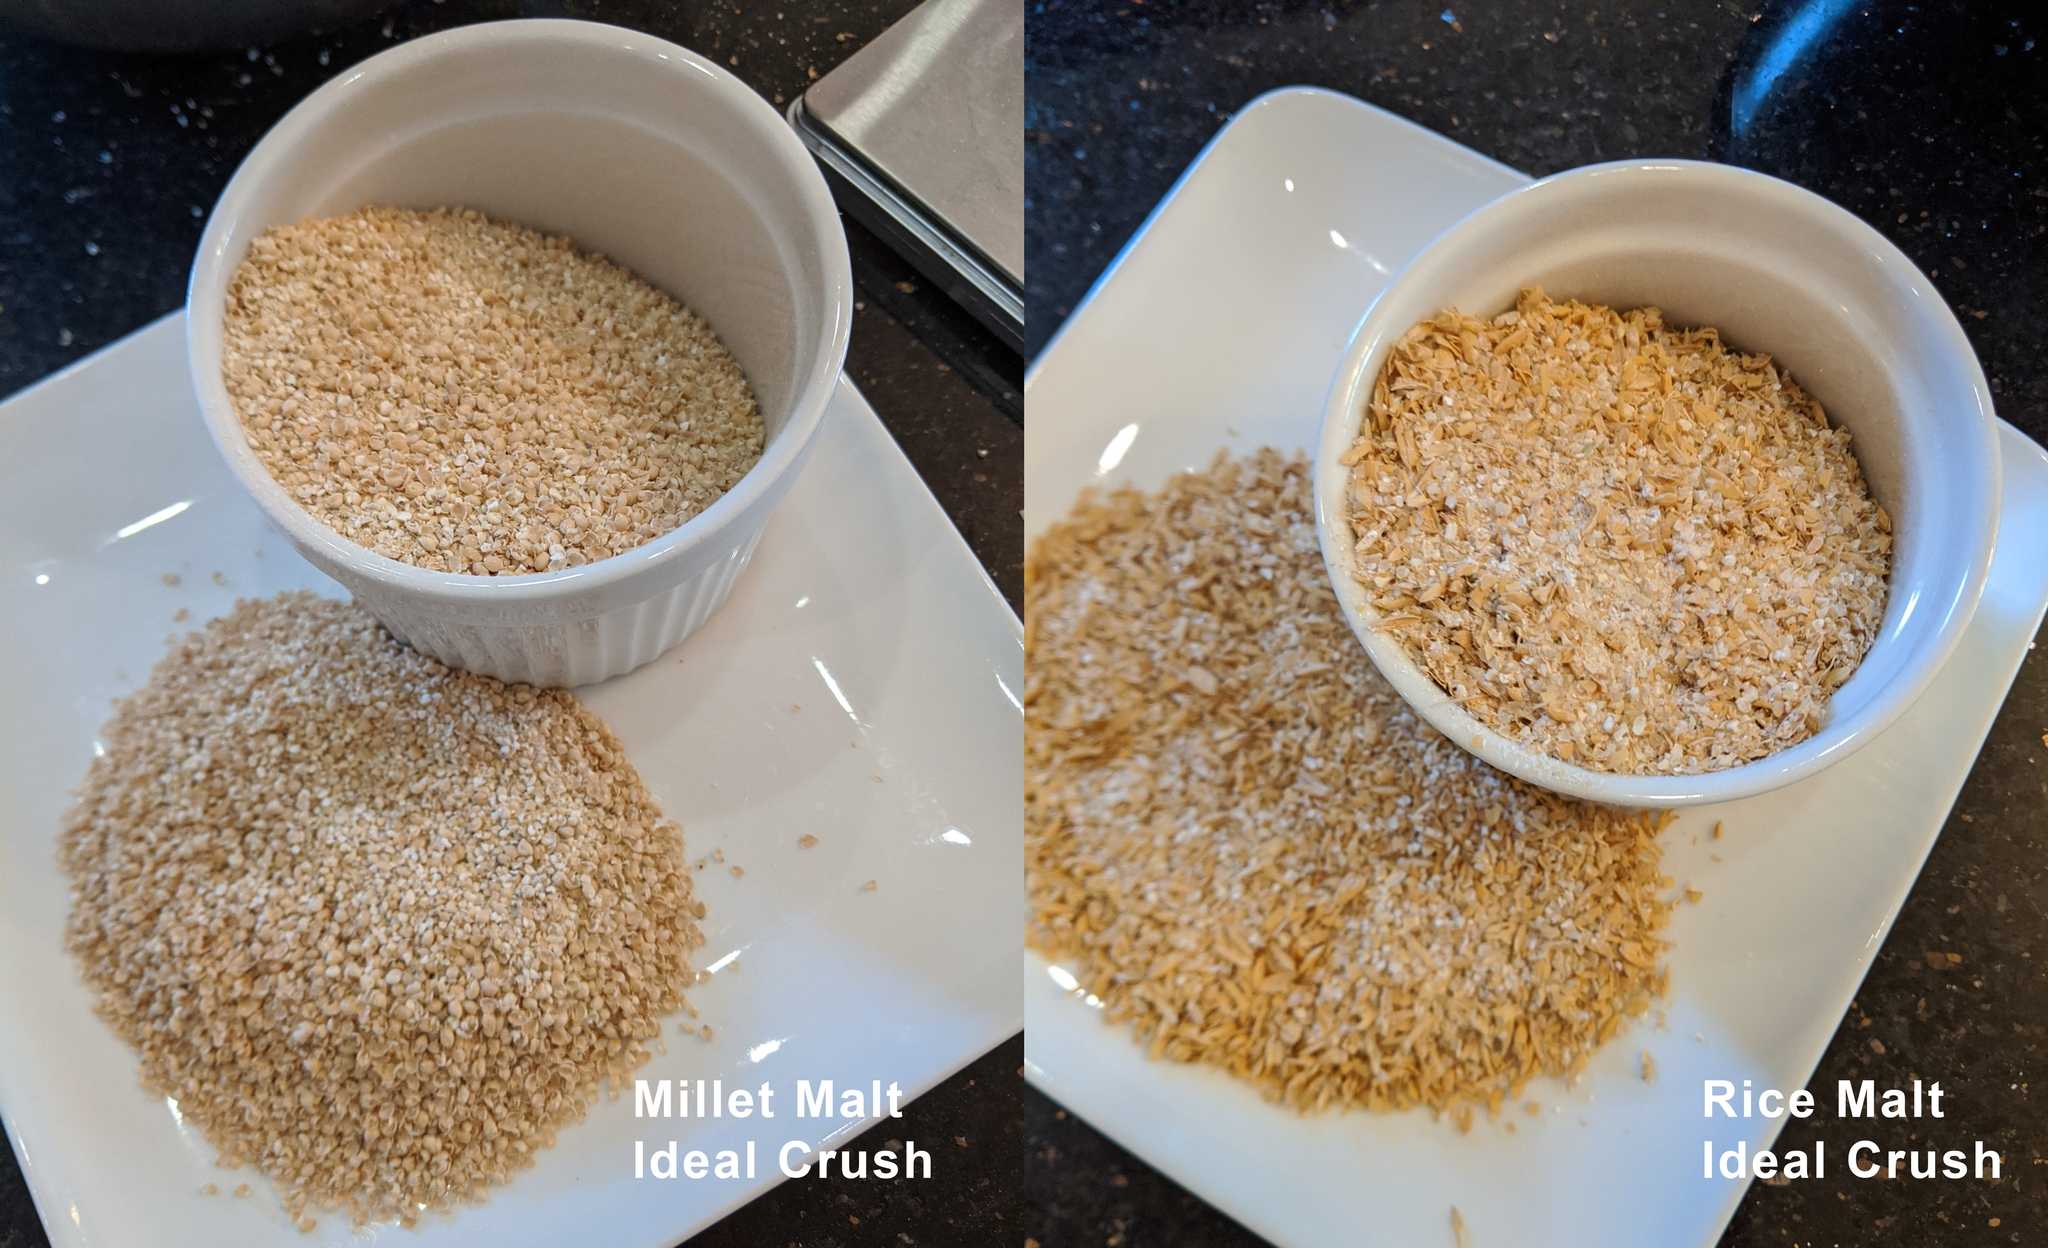
Based on these results, I think the ideal crush for our malts are as follows:
| Gap Setting (for the MM2) | Pan | #60 | #18 | #14 |
|---|---|---|---|---|
| Millet: 0.5mm, double pass | 5.8 | 30.8 | 39.4 | 24.0 |
| Rice: 0.6mm, double pass | 4.5 | 21.0 | 26.6 | 47.9 |
For the millet settings, you’ll probably need rice hulls or a certain proportion of rice malt to effectively lauter your wort. For rice malt, this grist works fine with no added hulls.
I’ve also put together a grist calculator, which you can use to estimate the recipe-specific ratios for mixed grists that contain both millet and rice. Simply enter in the weight of each (and optionally rice hulls) and choose your desired crush. As long as your #14 + #18 total is >70% and your flour is <7%, you probably won’t have any issues with stuck mashes.
* * *
As with all things in GF brewing, the process of figuring out an ideal crush drives home the point that relying on barley-based standards can lead us to suboptimal results. Thankfully, we now have high-quality malts and enzymes at our disposal, along with the brewing science necessary to figure out a practical path forward. Happy brewing!

